Panel Options
Customizing your panel!
Last updated
Customizing your panel!
Last updated
To access these settings:
Head to your Dashboard Select your server Go to the Panel Configs Tab Under Panel Settings, click on Panel Options
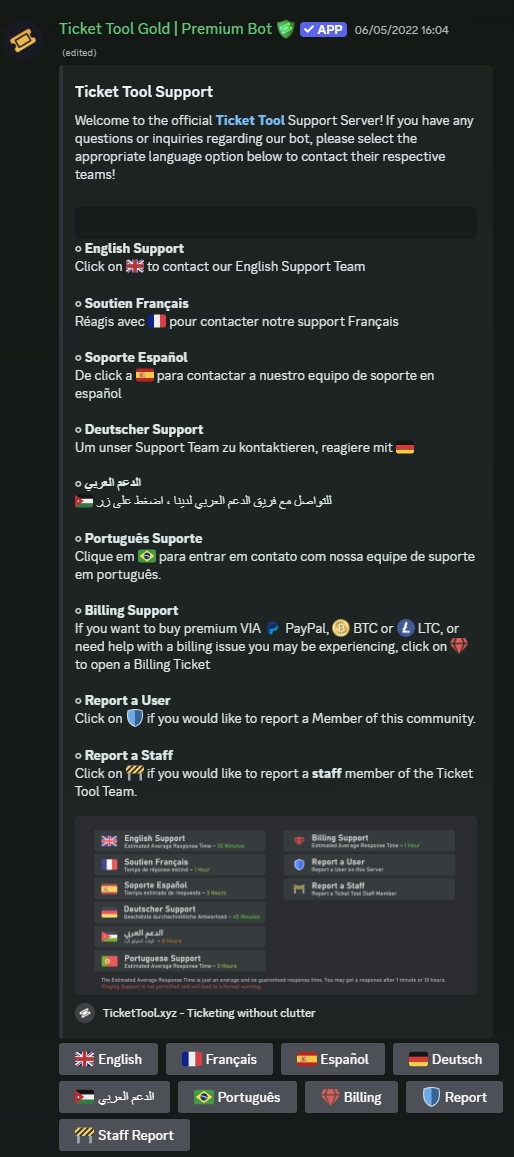
Multipanels are panels with multiple buttons attached to them - they can be set up using attached panels.
Here are the steps to create multipanels:
Step 1: Create a panel for each button you wish to have displayed under your panel. For example you might want a user report panel, a general support panel, etc.
Step 2: Attach your panels by adding them via the selection box in the attached panels section.
Note: if you're attaching all the panels to a panel called English, don't include English in the attached panels box (If you do this, it will create a duplicate button)
Step 3: Send the original panel (the one you are editing - it will be shown at the panel selection dropdown at the top of your screen) to the channel you wish.
Now you should have your own multi-panel!
Up to 25 panels can be combined into a single panel!
The first panel will be sent to the channel like it was sent to the channel on its own, while the others will only have their buttons added to this panel. When a user clicks one of the buttons, a ticket is made through the corresponding panel.
The multipanels can be used for many things, such as using them to create tickets for a specific language, like in our Support Server
When setting up multipanels you can choose what the maximum amount of buttons per row will be, this value must be between 1 and 5, i.e. the exceeding buttons from attached panels will be moved to the next row.
Here you can customize the message your panel will have once it's sent by Ticket Tool, as well as the settings for your [Create] ticket button, to know more about the settings of a button check our documentation on Message Buttons.
Make sure to always save changes using the pop-up shown whenever a change is done.